
Showing posts with label painting costumes. Show all posts
Showing posts with label painting costumes. Show all posts
Monday, February 23, 2009
RUR, Press release
SJRCC press release for RUR, Rossum's Universal Robots, produced at Florida School of the Arts in Palatka, FL, February 26-March 1, 2009.

Saturday, February 21, 2009
RUR robot circuitry
A bit of a sample of the circuits painted on the robots' wetsuits, with slick puff paint.


Wednesday, February 11, 2009
Dark outcome
Uh oh, what did I do? I had them paint everything a dark charcoal/black colour, and now, hmmm...not so sure I like it.


I had them paint everything a dark charcoal/black colour, and now, hmmm...not so sure I like it. However, I just tried to paint silver over it, and I think that the felt is too porous, still. 
Anyway, here is a collection of the paint mixing process which yeilded the silly charcoal, almost black paint. I think I used the other colours just for medium, to make the black go a bit futher, since, i did buy out all the black paint in Palatka also...=)
Tuesday, September 23, 2008
Watercolour tutorial for costume rendering
This is a tutorial for my costume students. The goal is to copy a rendering from a costume designer of their choosing--preferably one whose style they like. They are learning about painting styles and drawing styles in this exercise.
Copy the original sketch onto your watercolour paper.
In this case, I used William Ivey Long's rendering of Sybil in Private Lives.
I used the grid projection method, marking a grid onto both my original rendering and onto my watercolour. Make sure that the grid on the watercolour paper is very light, so as to be easily erased.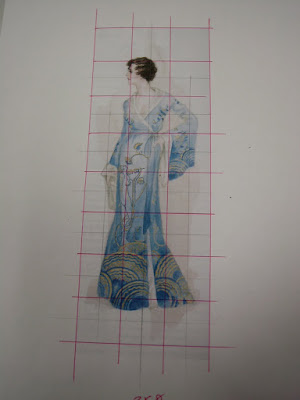 The grid on the watercolour paper was sized appropriately to get the figure in proportion with the paper.
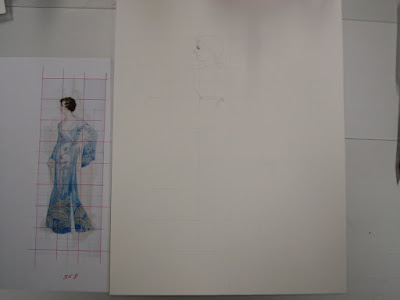 After drawing in all basic outlines, erase the gridlines, very carefully, so you do not disturb the surface of the paper.
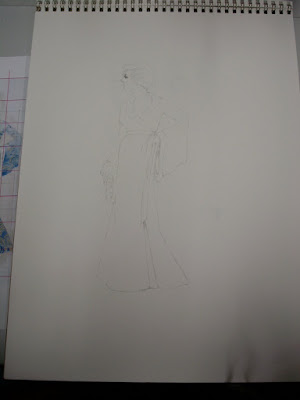 Start with flesh tones. Remember that in watercolour, when you need white, the paper will be your white. This flesh tone is Cadmium Red with a hint of Alizarine Crimson at the cheeks.
 The grid on the watercolour paper was sized appropriately to get the figure in proportion with the paper.
 After drawing in all basic outlines, erase the gridlines, very carefully, so you do not disturb the surface of the paper.
 Start with flesh tones. Remember that in watercolour, when you need white, the paper will be your white. This flesh tone is Cadmium Red with a hint of Alizarine Crimson at the cheeks.
When you are painting flesh tones, remember that you are working wet into wet, and that you are waiting for the paint to dry--watching it, for when it is slightly glistening, and there is very little water on the surface. When it has reached this stage, you add the slightest hint of the Crimson into the cheek area. If you add this "blush" before the glistening stage, you will have too much water and the Crimson will not "stay" where you put it. If you add it after the Cadmium has dried, you will have a hard line where she "painted" her blush on.
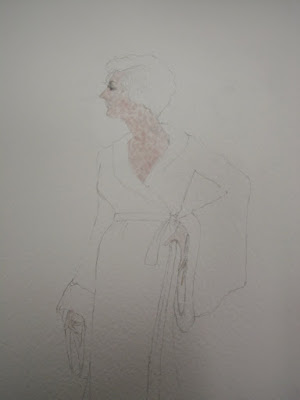 Don't forget the hands, and legs, if necessary.
 Don't forget the hands, and legs, if necessary.
 Next, paint the basic overall colour of the garment. In this case, I used both Pthalo Blue and Ultra Marine in a 50/50 mix. Remember that the white is your paper, and where the colour is lighter, that is where you thin out your paint and let the paper show through.
 This is the point where you will paint all soft edged shadows at the same time. If there are hard edged shadows, or parts/pieces to the garment that are the same colour, you will paint them in the next step,
after you let this step dry.
 Once the previous step is dry, paint all hard edged shadows. Also paint the specific shapes that are in your garment. For example, here, I have dark circles and oval shapes which are darker than the background and need hard edges.
For example in a man's suit, you would paint the left sleeve and the right front and let them dry. Then you would paint the right sleeve and the left front. This step keeps the seam-lines as natural as possible in your garment, so that you don't end up cartooning them back in with a marker or pencil.
 Be patient.
Let things dry.
 Next, you can paint the hair.
Paint the lightest (highlight) colour all over.
LET DRY.
 Once that is dry, then you can paint the low-lights, or darker colours--if there are more than one, repeat this process until you have achieved the look and depth you want.
 Paint in the background, or ground. By this time, if you have used a variety of colours, your dirty water that you wash your brush out in should suffice for this effect.
Be careful not to let this get too muddy or too elaborate that it draws attention away from the costume itself.
 At this point, you can also add in some more dirty, hard shadows to the figure and costume.
Any white on the costume needs to be slightly shadowed at this time--just to tell it apart from the background white paper.
 If your rendering has surface detail to the fabric, and it is to be painted, lightly draw this in with pencil now.
 If this detail is to be coloured with a pencil or pen, use that colour now. Be careful that you are finished with all shadows and overpainting--OR know that your pencil or pen you are using is waterproof.
The gold one I am about to use is not waterproof, so I needed to paint the dark blue surface detail first.
This is the case with a lot of gel pens, and free-flowing rolling-ball pens unless they say permanent on them.
 Paint in the darker surface detail.
You can alternate the paint with the pen as you go--be sure to let your darker paint dry before trying to draw onto wet paper.
 Don't forget the facial details--you can paint those once the flesh tone is dry.
 Draw in with the gold pen, on top of the dry paint.
 Continue very carefully, working from furthest away from your working hand so as to not drag your hand across the newly penned or painted work.
 When you are finished with the surface detail, go ahead an go back over some dark lines with pencil. Do NOT outline your whole rendering--it will start to look like a cartoon. Choose your pencil very carefully--a light pencil or a coloured pencil will work well for those places that need a little extra last minute shading.
When you are finished painting YOUR work, you should sign it. Your signature is up to you. Its placement should be close to the figure, but not distracting from the figure.
You should also indicate the name of the character and the show it is for.
Subscribe to:
Posts (Atom)